CensorLab VM
CensorLab provides pre-built virtual machine images with everything pre-installed: CensorLab, all dependencies, demo scenarios, and a desktop environment. This is the easiest way to get started in classroom or workshop settings.
Requirements
- VirtualBox (7.0 or later recommended)
- At least 4 CPU cores and 8 GB RAM allocated to the VM
- ~10 GB free disk space
Download and Import
x86_64 (Intel/AMD)
- Download the x86_64 OVA
- In VirtualBox, go to File > Import Appliance
- Select the downloaded
.ovafile and click Import - Start the VM
aarch64 (Apple Silicon Macs)
Due to a limitation in the Mac version of VirtualBox, aarch64 images must be imported as a drive rather than an OVA.
- Download the aarch64 VMDK
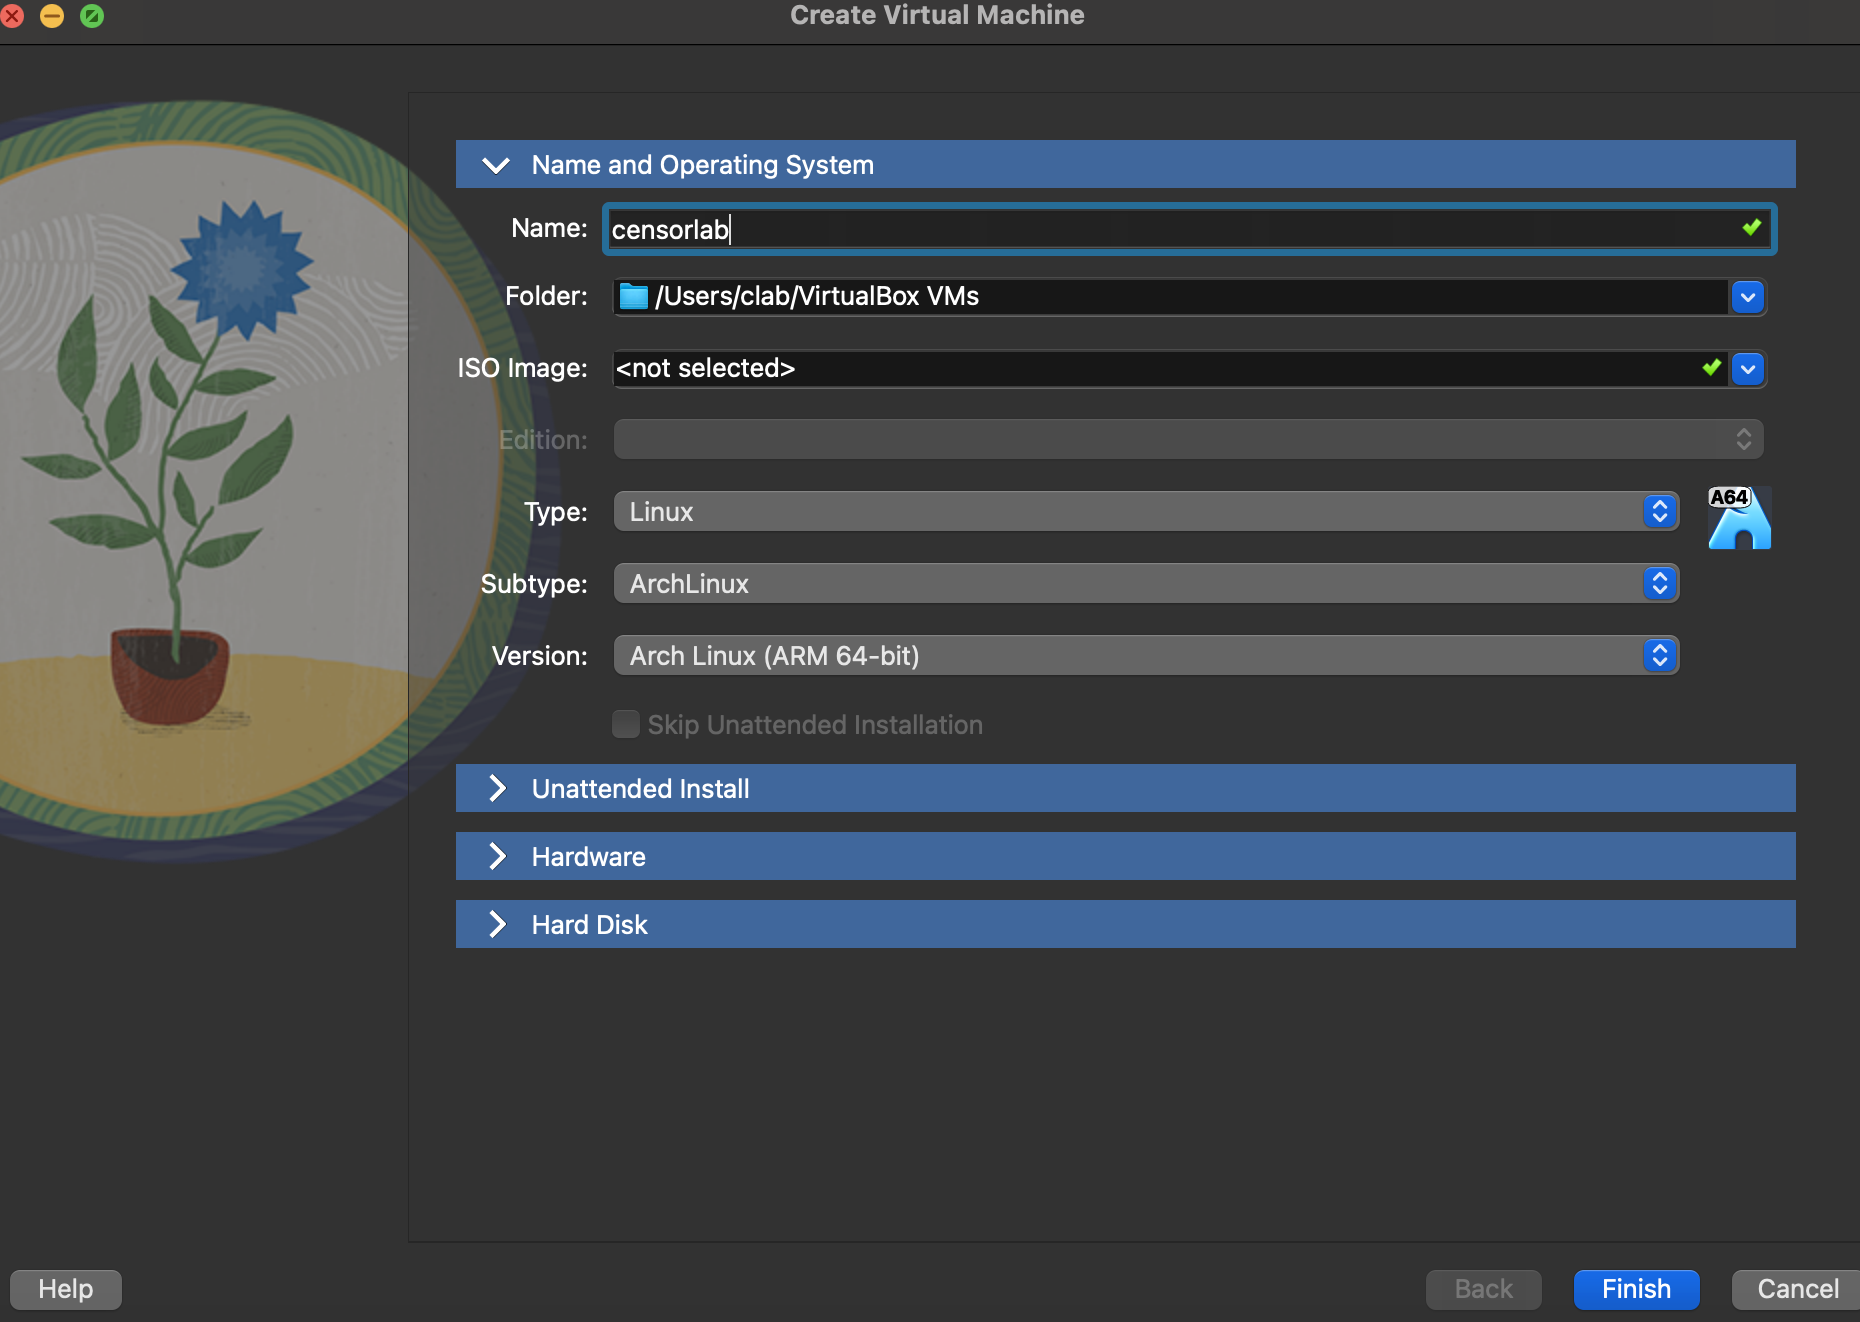
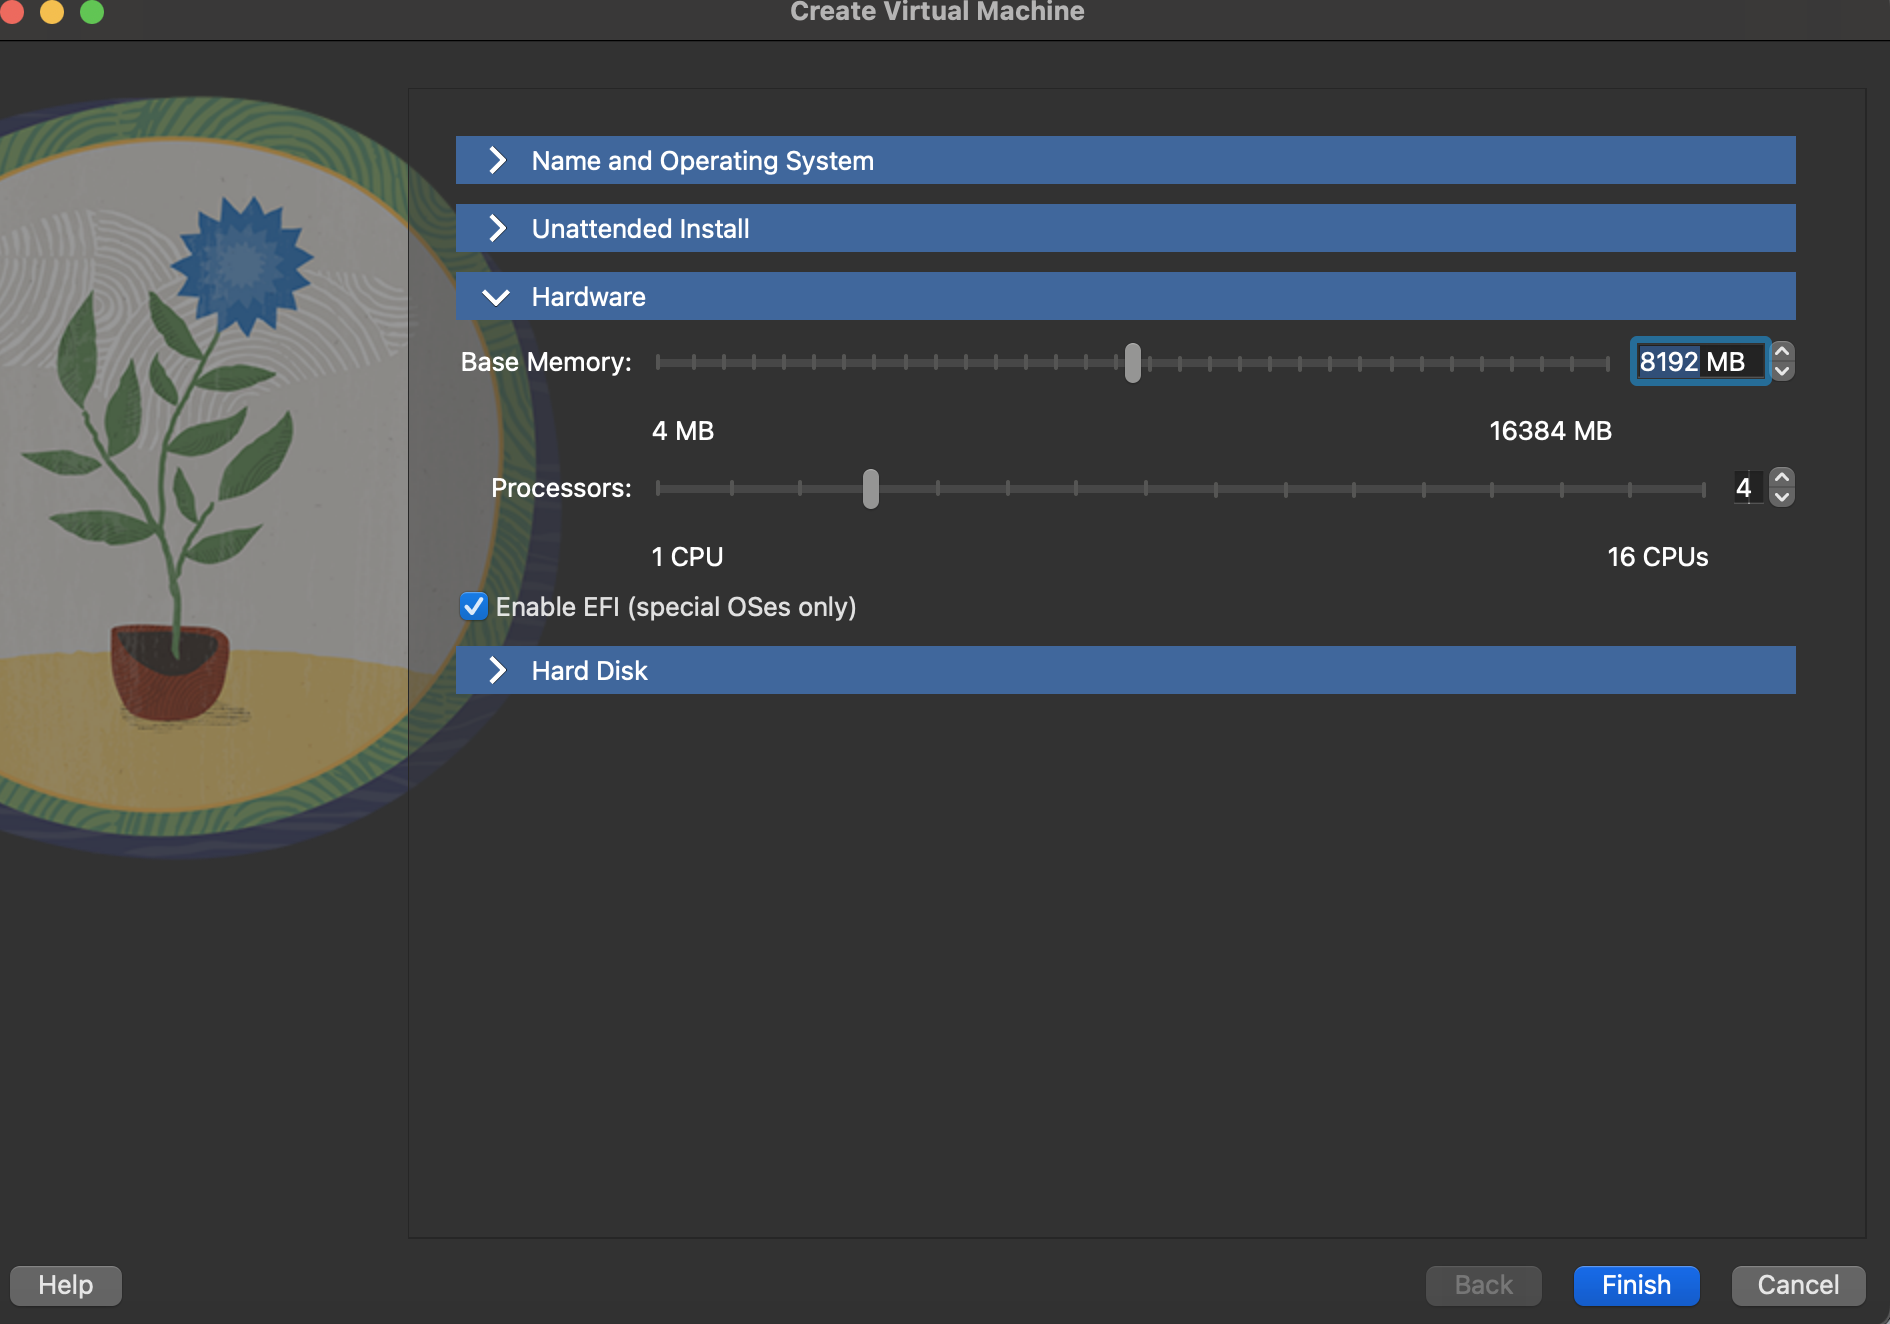
- In VirtualBox, create a new VM with these settings:
- OS Type: Arch Linux (arm64)
- CPU: 4+ cores
- Memory: 12 GB
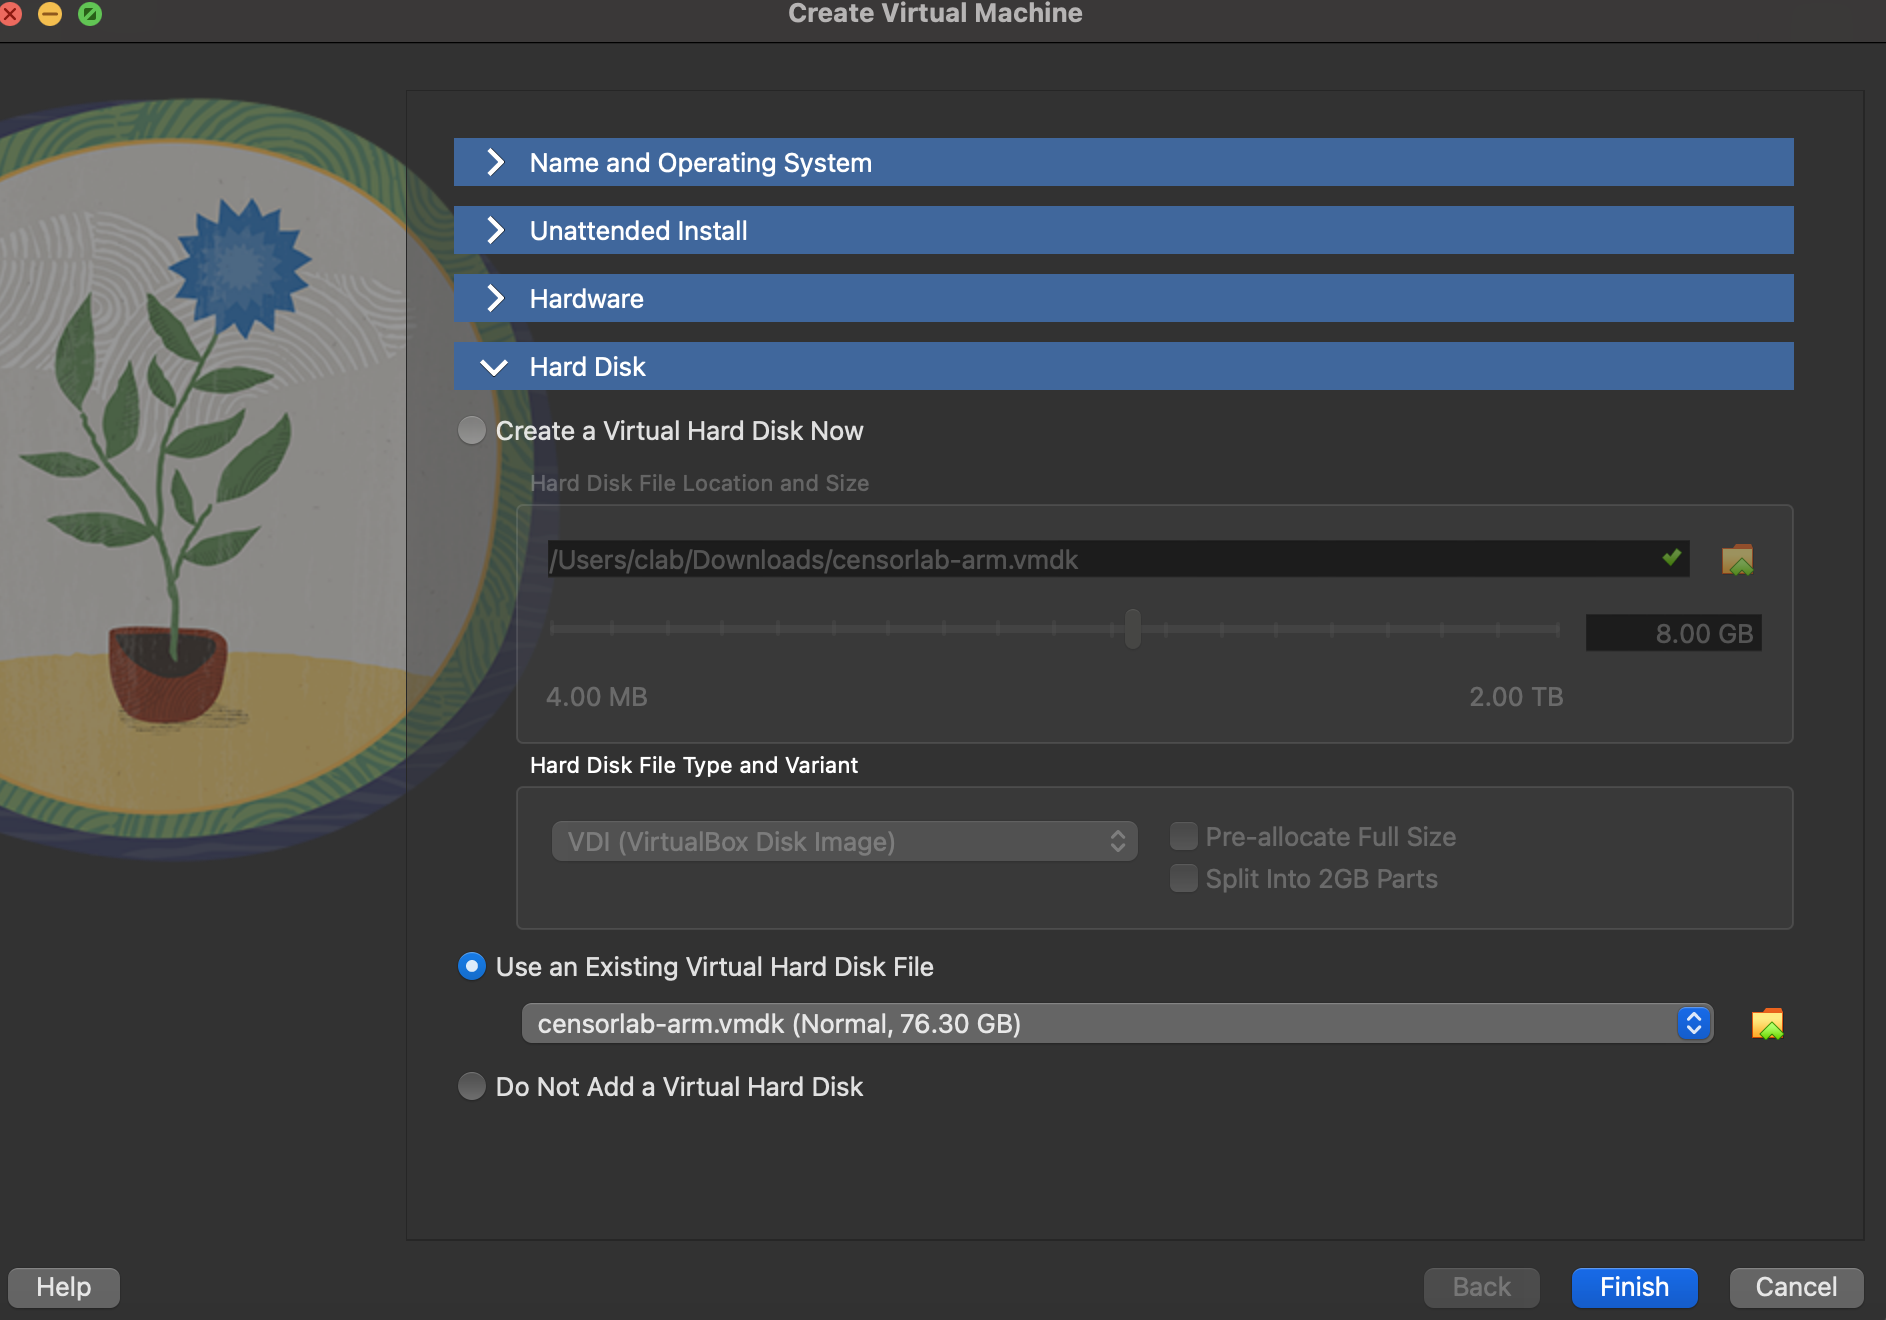
- When prompted for a disk, choose Use an Existing Virtual Hard Disk File and select the downloaded
.vmdk - Start the VM
First Boot
Once the VM starts, log in with:
| Username | censorlab |
| Password | c3ns0rl4b612@@! |
The desktop has two shortcuts:
- CensorLab Docs - Opens the full documentation in a browser
- CensorLab Demos - Opens a terminal in the demos directory
Running CensorLab in the VM
CensorLab is pre-installed and on your PATH. You can run any demo immediately:
# DNS blocking
censorlab -c demos/dns_blocking/censor.toml nfq

# HTTP keyword blocking
censorlab -c demos/http_blocking/censor.toml nfq

# TLS SNI blocking (HTTPS)
censorlab -c demos/https_blocking_tls/censor.toml nfq

# QUIC blocking
censorlab -c demos/quic_blocking/censor.toml nfq

# Comprehensive GFW emulation (7 techniques combined)
censorlab -c demos/mega_gfw/censor.toml nfq
CensorLab automatically manages iptables rules in NFQ mode. No manual nftables setup is required.
Try it interactively
Start the HTTPS blocking demo, then test it with curl:
# Start CensorLab in the background
censorlab -c demos/https_blocking_tls/censor.toml nfq &

# This works fine (not on the blocklist):
curl https://google.com

# This hangs (TLS ClientHello is dropped):
curl --max-time 5 https://example.com

# Stop CensorLab
fg   # bring to foreground
# Press Ctrl+C
Analyzing a PCAP file
You can also analyze saved packet captures without live interception:
censorlab -c demos/dns_blocking/censor.toml pcap capture.pcap 192.168.1.100
Writing a Censor Program
Create two files:
my_censor.toml:
[execution]
mode = "Python"
script = "my_censor.py"
my_censor.py:
from dns import parse as parse_dns

def process(packet):
    udp = packet.udp
    if udp and udp.uses_port(53):
        try:
            dns = parse_dns(packet.payload)
            for q in dns.questions:
                if "example.com" in q.qname:
                    return "drop"
        except:
            pass
Run it:
censorlab -c my_censor.toml nfq
For the complete API reference covering all packet attributes, protocol parsers (DNS, TLS, QUIC), ML model integration, and the CensorLang DSL, see the full documentation.
Updating the VM
The VM runs NixOS and can be declaratively updated to the latest CensorLab version:
censorlab-update
This fetches the latest system configuration from the CensorLab repository and rebuilds the system. No data is lost during updates.
Troubleshooting
SSH stops working after starting CensorLab: CensorLab intercepts all network traffic on the interface, including SSH. Use the VirtualBox console (graphical display) instead of SSH when CensorLab is running in NFQ mode.
Packets are being dropped unexpectedly: Check that you don't have leftover iptables rules from a previous run. CensorLab cleans up its rules on graceful shutdown (Ctrl+C), but if the process is killed forcefully, rules may persist. Run sudo iptables -F to clear them.
VM is slow: Ensure you've allocated at least 4 CPU cores and 8 GB RAM. Enable hardware virtualization (VT-x/AMD-V) in your BIOS if not already enabled.